Showing posts with label Crafting. Show all posts

Sunday, September 30, 2012

Zig Zag Quilt

So this is my first attempt at any sort of a quilt. I really want to make one for Riley but I didn't want to mess it up so I headed to Joann's and bought some pretty cheap fabric that was even more on sale and started out making the zig zag quilt which I figure Patrick and I can use on our couch when it is done. I got the pattern for the zig zag quilt here and it is a pretty good tutorial.


 I have learned a lot since starting this quilt. Here are a few things I learned:

1. How to cut straight and square lines. After cutting and sewing all of the strips for this quilt I went to my friend Lori's house where she proceeded to look at my work and shake her head. My strips were not straight. In fact I had cut all of the colored strips at 3" and all of my white at 2.5". I thought I was tired when I cut the white but not that tired. So she told me I needed to take apart all of the strips and that it might be easier to do squares, which is what I would have done eventually according to the instructions. I headed to Joann's for more white fabric. I started out with plain white fabric but the second time around I found this cute polka dot fabric and stuck with that.

Finally starting to look like a quilt, laying out the squares for the first time

2. How to use a seam ripper. After Lori told me my lines weren't straight she told me just to seam rip all of them apart and basically start over. In my mind I cried because it turns out I didn't know how to seam rip. I thought that I would have to take apart each stitch one by one as that is how I have been doing it my entire sewing career, all 2 months of it! Ugh to find this out was wonderful and life saving. I couldn't believe it when she acted like it was no big deal but turns out it isn't!
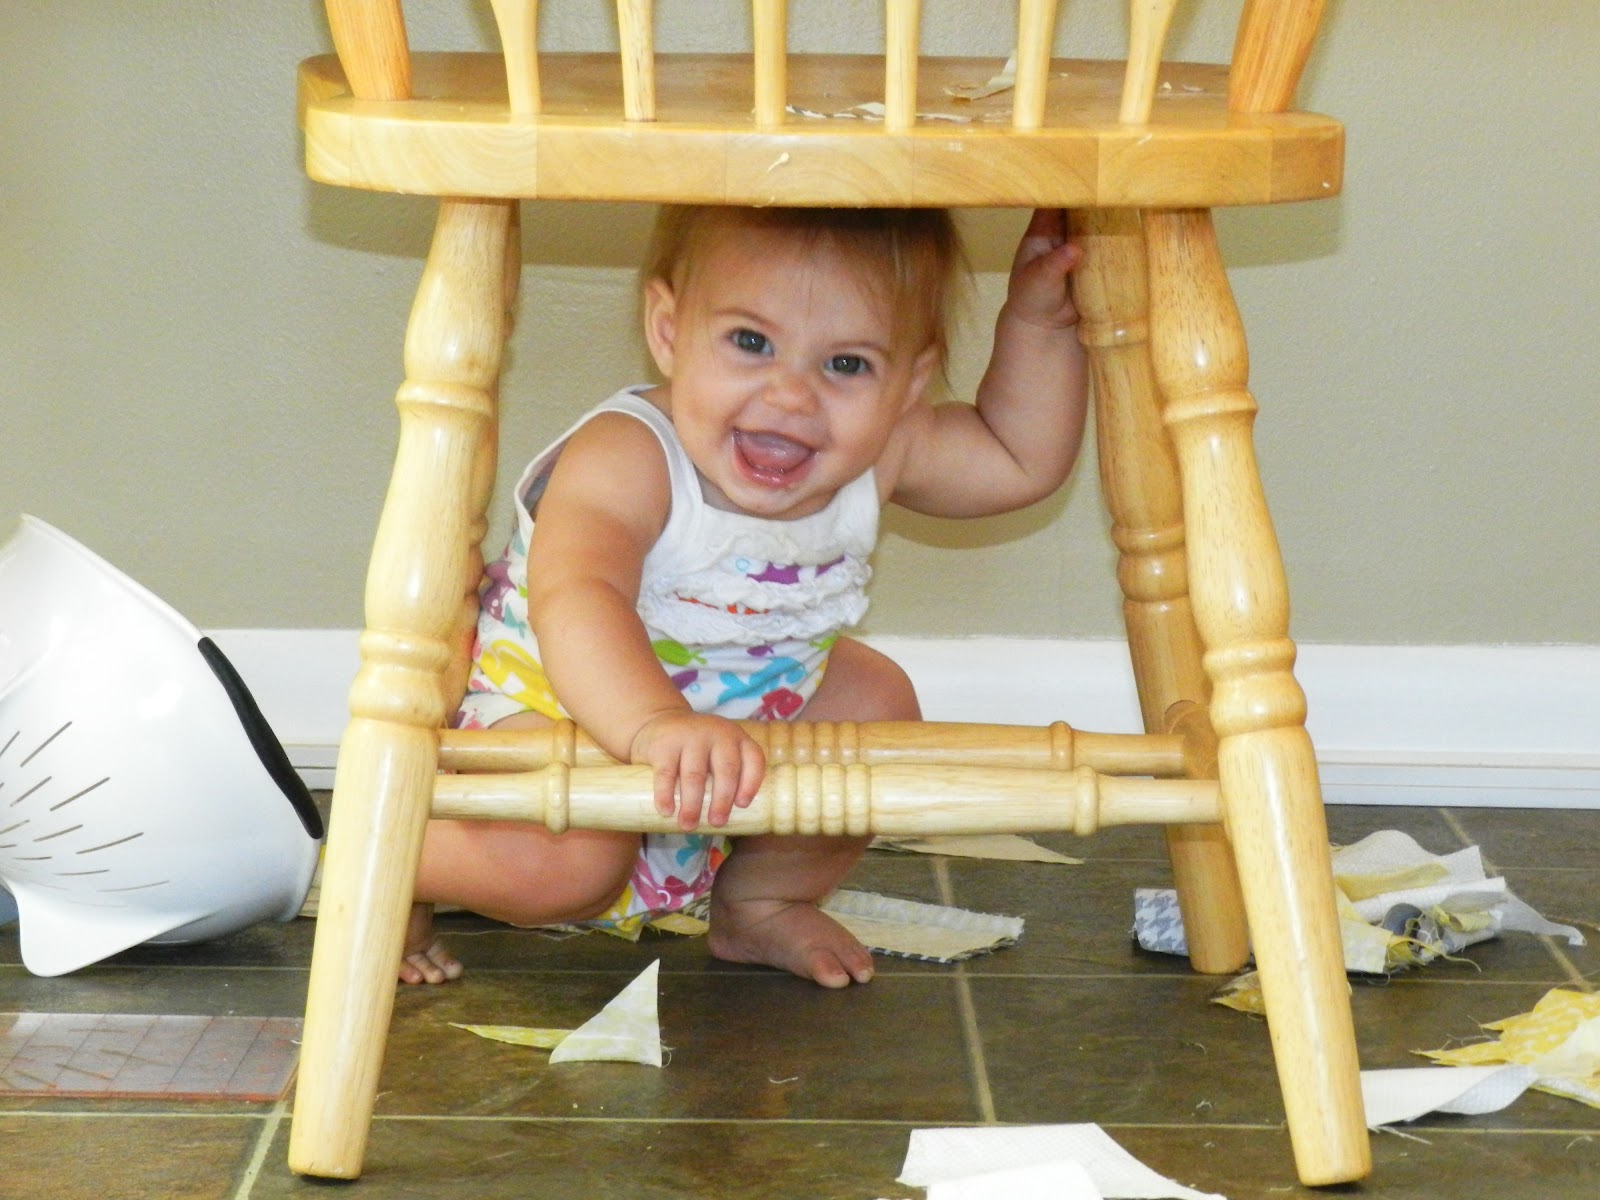
I got to sew when Riley discovered scraps of fabric were fun to play with, this lasted about 2 times!

3. How to chain stitch. This made my life a lot easier, I was under the impression that I had to cut the thread on every single square and that is not the case. Chain stitching made everything go way faster.

4. Speaking of fast I also learned how to sew fast. Yes it is intimidating but it actually is easier. I thought the slower that I went the more precise my lines would be and that is not the case, my lines looked worse than when I went fast, I think there was just more room for error so I now sew fast!

5. Now having said that go slow when you are machine quilting. I also learned that when using this stitch you must use good thread otherwise it will break because the tension is so tight for this stitch.

6. I decided to do the backing a little different than just a plain color and this was the worst idea for a first quilt. I wanted to do a zig zag and have it line up with the front zig zag. Well this didn't work out perfectly at all, my stitch is way off but it is my first quilt so I can't worry about it. All I can say is it is perfectly imperfect!


7. I also learned how to hand stitch the binding which is the only hand stitching I did on the quilt. I found that I love the look of this hand stitch better than if I would have done it on a machine. I learned how to do this at mommy by day crafter by night. I love her website and I can relate because she is a fairly new quilter as well and a young mom like myself.

My mom at one point came to me when I was about half way through my quilting and said "you should enter your quilt in the fair!" I thought this was a great idea and she told me that it didn't have to be taken to the fairgrounds until a day or so before the fair started so I thought to myself I can definitely finish this in 3 weeks...I thought wrong! I had a wedding at the beach that we went to and then ended up working almost every day in between, not to mention I didn't have 3 weeks I had 2 weeks. Needless to say I didn't finish the quilt in time despite me staying up all night long. In the end I got everything but the binding done and then it sat there for about another month before I decided to finish it. Next time I just have to go at my own pace and I suppose next year I can enter the quilt, lets hope it is done by then!

Needless to say I am addicted to quilting officially and am in the process of a couple more already!

Tuesday, August 7, 2012

More Baby Blankets

So after a couple of practice blankets I decided it was time to make Riley's baby blanket. And here it is, I love the vintage look of the bikes and small flowers. The only thing I wish I would have done was make the name in a darker fabric so that you can see it a little better but it looks so sweet in person that I can't complain much!

 I also have a picture of the blanket that I made for my friend Cassie's baby Sophia. I love this one and most people say that so far it is their favorite!

Thursday, August 2, 2012

Andrea's Bridal Shower


Andrea's bridal shower was last week and it was so beautiful. We couldn't have asked for better weather and so many of her friends showed up to celebrate. It was at a winery in the middle of the country and it was so beautiful! Abbie and I were able to throw some food and activities together, I wouldn't say this is my specialty but we did ok! I can't wait for my friend to get married, the wedding is going to be wonderful and very beautiful!

I made this pillow for Andrea to put on her bed as part of her gift. I have a little tutorial below. I paired it with 3 bottles of wine in a basket for her!


Step 1: Buy the burlap, enough to cover the pilow form that you buy.
Step 2: Sew 3 sides of the burlap (I left the bottom seam open) and flip inside out.
Step 3: I printed out letters on Word and traced them on the burlap with a fabric marker.
Step 4: Put the pillow form into the burlap cover and stitch the bottom opening. I did a rough stitch with a thick black thread, it kind of looks rough but that was the look I was going for.

I actually made these cupcakes as well for the bridal shower, very surprised at my ability to bake and have people actually like them but it was successful.

Sunday, July 8, 2012

Baby Leg Warmers

 Isn't she the cutest baby you have ever seen, or I am just a little biased because she is my wonderful baby! I made these leg warmers for my cousins baby Callie on her one year birthday, that is why these leg warmers are a little big on Riley, she is only 2 months old in these pictures! Despite them being rather large on her she loved being the model and is ready for some of her own.


These leg warmers are great for when baby's start rolling around and crawling, especially if you have carpets so that they don't get rug burn on their little knees. My daughter is now trying to crawl so I am just about to make some more of these cute leg warmers and since a lot of her clothes are cute little dresses they work really well for our cooler walks and it makes it really easy to change her diaper! So here is a short and easy tutorial of how I made them with my inspiration coming from Our Little Beehive.


What to Buy:
1 pair of women's socks
Matching thread
14" total of elastic, for the bottom of the leg warmers, I used 1/2" wide and make sure that it is fairly flexible to work with rather than stiff.

Step 1: Cut your elastic into 7" strips and sew together with a 1/4"-1/2" overlap so you are left with two elastic circles. Throughout this project use a zig zag stitch so that it can stretch. Depending on how big you need the leg openings, if they are a chunk a munk you may want to make them slightly bigger.

Step 2: Cut your socks as shown in the picture.
Step 3: Fold your cuff inside out and place the elastic over the top and then fold over to make a cuff.

Step 4: Place the cuff over the bottom of the leg warmer so that you see 3 raw edges that you need to sew. Sew around the edge. I choose not to pin because it is hard to sew this to begin with that I usually end up poking myself. Just make sure if you do it this way that you make sure you have all three layers under your stitch when you sew.

Step 5: You are done. Just smooth it out. I made 3 of these during Riley's nap today which was only about 30 minutes so these are very easy to make!
This is Riley today wearing her leggings. Although the color white matches almost anything I do have one warning, they will get extremely dirty, especially with all the dog hair that she happened to pick up so a darker color may last longer!


Friday, June 8, 2012

Fabric Covered Flower Pot

So my friend Courtney moved back home from Oklahoma about a week ago and moved into an apartment. It is super cute inside but the outside needs some work, well I'm sure she wouldn't mind if she got new neighbors but I am going to do what I can to help it look welcoming! So I decided everyone could use happy flowers and I couldn't find any ceramic pots that I totally loved so I made my own.
Then my mom loved the one I made Courtney so much that I decided to make her one for her anniversary, 29 years, almost unheard of now a days huh! She loves birds so I brought back the same fabric that I made my diaper and wipe clutch with and she loved it!

First off I did get my idea from Pintrest, where else?!?! off of the small garden, so I definitely can't take all the credit but I will give some helpful hints on how I did it for any of you that would like to try it! It is super simple and I think very thoughtful for a gift, people can only get so much wine right, I can't believe I just said that haha oh how having a baby has changed me!


What you need:
I bought a terra cotta pot from Hobby Lobby for $3.
The fabric I got from Joanns and I bought 1/4 yard, I could probably make two of them so the fabric goes a long way, just make sure it wraps all the way around the pot.
Mod Podge, which I made myself off of this website, very easy!
Spray paint, Color for the bottom and a clear outdoor sealant.
Foam brush
Flowers, I choose a Red Dahlia and a pink Gerber Daisy
Potting soil

Step 1: I spray painted the water catcher for the bottom of the pot, technical terms I know, with red spray paint that is indoor and outdoor so it won't wear.

Step 2: Cut the fabric so it will go all the way around the pot, there will be extra on the top and the bottom but you will trim it once you apply it all.

Step 3: Apply mod podge on the actual pot in small sections and smooth the fabric out with a foam brush. Make sure and smooth out all the wrinkles.

Step 4: Once I got the fabric applied to the pot I applied a layer of modge podge to help seal it, especially around the edges of the fabric if you had any patch work like I did.

Step 5: Cut off where you want the top of the fabric to end, I wanted it just inside the top of the pot, my edge is not straight by any means but it works and then I finished the edge off with more mod podge.

Step 6: Let it dry.

Step 7:  Cut off all the extra fabric at the bottom of the pot and mod podge the edges. Let dry.

Step 8: Seal the pot with the clear indoor/outdoor spray and let dry.

Step 9: Pot your flower and water it!!!

Thursday, May 24, 2012

Diaper and Wipe Clutch

So I was on a mission last week to find the perfect fabric to make a diaper and wipe clutch. I had seen some on etsy but of course wanted to make my own. So my friend Lori and I set out for Lori and Mel's day of fun! First we went to Stash which is the cutest little fabric store downtown. I didn't see exactly what I wanted there but I did get inspired to make my first quilt, that is another story all together. Then we went to Joann's, I had to pick up some fabric for some baby blankets and I found a cute fabric there to use for my diaper and wipe clutch.
I didn't have a pattern and even if I did I'm not sure I would know how to read it but I managed and it turned out fine, I think the second one, if I ever get around to making it will be a little more finished! 

What you need:
2 different type of fabric. I used light yellow minky dot fabric for inside and a vintage looking bird cotton fabric from Joann's.
Interfacing
Decorative button
Velcro
Matching thread
Step 1: Start by cutting the size of fabric you want. I cut both fabrics 14" by 11.5". Cut the interfacing the same size.

Step 2: Iron on the interfacing to the bird fabric, I didn't do it to the dot fabric because then the dots will stick to the interfacing and not stick up and be cute.

Step 3: I wanted to make the strap first before sewing the bag so I knew how big to leave the opening. I took a piece of interfacing the size that I wanted the strap to be and ironed it on to a piece of bird fabric, leaving one side just slightly wider than the other. I stitched both ends of the strap.

Step 4: I then brought the fabric in the middle to meet and folded the slightly longer side under so that it would look more finished. I stitched right on the fold all the way down the middle.

Step 5: I then placed the two fabrics with the right sides facing each other as shown in the photo and stitched around the outside with a 1/2" allowance leaving an opening where I want to place the strap. When I was done I pulled the fabric through so it was all facing the right way.

Step 5: The pockets inside, In hindsight I should have sewn the pockets on before sewing the two main fabrics together so that it looked a little more finished but I didn't, so live and learn I guess! I just pinned where I wanted the bottom of the pocket to be on both sides of the clutch.


 Step 6: I pinned and stitched all the way around the pocket before without actually attaching it to the main clutch. The good thing about this fabric was that it is stretchy so it will fit my diapers or my wipe case. I know this is messy but the project was a little messy for me too!
Step 7: This is where I went and did a top stitch. all the way wround the outside of the bird fabric (you can see the pocket is sticking out and not top stitched until this point. It gets a little tricky because you have to get the strap inside where the opening is, you have to make sure the pockets are in the right place and it can get pretty thick but it is manageable.


Step 8: You then need to have some sort of way to keep the clutch closed. I really wanted a magnet closure and bought two different kinds but neither of them worked so like all the other projects if all else fails use velcro and add a cute button. Just make sure when you are sewing it on that you don't get the pocket dewn shut, since the dot fabric is stretchy it was easy to get out of the way when I sewed it on the machine. Also when I sewed the button on I was sure to sew around the edge of the velcro so you couldn't see all the thread. And voila, you are finished and ready to change your baby's diaper anywhere now, if only it was that simple!

Saturday, April 21, 2012

Diapers and Wipes Strap

As a new mother I have learned that taking my huge diaper bag into public restrooms isn't necessarily the best practice, despite how cute my brown and pink coach diaper bag is! It is rather hard to juggle a squirmy baby and a huge diaper bag while trying to find a spot to change a baby. Have you noticed the lack of changing tables in public places? I used to think there were useless couches in those ladies restrooms all over but then I realized I only shopped at the Emporium or The Bon when I was younger and they were the only ones with couches! The lack of changing tables is actually my opening argument on why I need a larger vehicle to drive, you know so I can change the baby on the seat in the bigger car, with the door closed instead of trying to keep her on my lap in my tiny Mazda. So far my argument isn't strong enough and I am still driving the small car. Hence the reason for this tutorial. This is way easier to sneak off to the bathroom with and then I don't have to dig through my diaper bag to get what I want each time I need to change my baby!

I made this diaper strap with inspiration from Calico. I did it as a matching set with the baby blanket that I did a tutorial on earlier and this is the first one that I made. The dot minky fabric worked perfectly for this project because it is stretchy however it is thicker than the fabric used on the Calico website so I made it differently the second time and that is the tutorial I will provide on here.
What to Buy:
I had some left over fabric from the baby blanket that I made earlier. It is minky blue dot fabric
Matching thread
Button
Sew on velcro


Step 1: Cut your piece of fabric. I did mine 5" wide by 15" long. It doesn't have to be perfect but try to make the lines fairly straight.
 
Step 2: Pin and sew the two ends of the fabric at about 3/8" on your sewing machine. 

 Step 3: Fold the fabric (hot dog way) with the wrong sides facing out and pin. Sew a straight line on the pin side, make sure and make the stitching at the point of how wide you want your strap and make sure the opening is wide enough to turn the fabric right side out.
Step 4: Press the fabric and top stitch. I did two top stitches just to add a little bit of a pattern and it turned out pretty well.


Step 5: Sew the velcro on the respectable sides of the fabric. I tried to stay lined up with my previously done top stitches but I wasn't perfect and it still looked ok.

Step 6: Hand sew the button onto the top of the strap. Voila you are done!


Friday, April 20, 2012

Baby Blankets

My husbands step sister was just recently blessed with the adoption of an adorable baby boy Jonah. We are so happy for them, they are one of the most deserving couples we know to raise a child. It got me thinking about what I would have liked to have when I had Riley and one thing I never got was a personalized blanket so I decided to make one for Jonah and then a couple more for some people that I work with and then I will make one for Riley, you know after some good practice! Here is how I did it, I guess you could call it a tutorial but I have never done this before therefore there may be a different and better way. I got the idea from this wonderful blog, Make it and Love it, and with some changes I made it my own!


What to buy:
2 yards total of fabric, I used 1 yard of minkey dot fabric and 1 yard of soft monkey fabric
Pins, lots of them
Heat bond paper, you don't need a lot just enough for the letters and it is cheap
Matching thread

Step 1: I started out with 1 yard of brown dot minky fabric, it is so soft and babies love it, this is on the bottom in the picture. It was a little bit wider than the monkey fabric so there will be some left over and you will use this for your letters and then later for another project. I also got 1 yard of the monkey fabric out of the baby section. I just lined them up to make sure they were approximately the same size. Make sure to prewash both fabrics and to at least iron the monkey fabric so the edges lay flat.
Step 2: I then went along the edge of the monkey fabric and pinned the fabric 1" up on the bottom so that I could make sure the letters were going to be in the right place.

Step 3: I went onto Word on my computer and printed out what I wanted the name to look like on the blanket. I got a heat bond backing and cut it the same size as the letters. I then had to trace the letters on the heat bond paper so that it was the mirror image, that way when you bond it to the fabric you can see the tracing on the back and cut out the letters the right way. Takes a little bit of thinking huh!


Step 4: I bonded the heat bond paper to the minky brown fabric. When you iron this on the dots will go away and that is ok, it stays so soft and it looks really cute even without the dots. I then placed the letters where I wanted them to be on the blanket (bottom right corner) and heat bonded them to the monkey fabric so they could stay in place for me to hand stitch.


Step 5: I just used brown thread for the hand stitching but on some of the others I used contrasting stitch colors which looked great too as long as you are fairly good at hand stitching.

Step 6: I then pinned the fabric face side together so that you only saw the wrong side of the fabric on both sides. I marked 1" around on the monkey fabric so I was sure to get fairly straight lines. I used a lot of pins because these two fabrics are so different, the minky brown is stretchy and kind of slick and the monkey is not stretchy and sticks.

Step 7: I then sewed all the way around the blanket except for about 6" at one of the corners. If I were to give you a word of advice it would be to leave the 6" on a side and not a corner because it will be easier to hide later. Be careful with the minky fabric because when you are sewing on it it folds up really easily, just make sure it is laying flat on your sewing machine.
Step 8: I cut the extra off of the corners before pulling the fabric through because then all the fabric doesn't bunch up and make the corner bulky.

Step 9: I then pulled the fabric through that 6" and made the blanket with the right sides out. The only thing that was left was the 6" opening and I just pinned it together like this so that I could do a top stitch to sew it together.


Step 10: I ironed the fabric so it would lay flat and then top stitched around the whole blanket which only took about 10 minutes total, minus the few hold ups that I had (aka baby, learning to actually sew, etc.)


It actually turned out pretty good, I feel good about it being my first blanket, now only 4 more to go but all in all if I could sit down and do one without interruptions it would probably take me about 1.5 hours, hand stitching takes the longest on the letters.

Here is another blanket that I made for one of my co-workers Jeffery. I love the colors and actually bought an extra yard of fabric in case I have another little boy to make one for, maybe my son someday! Here are pictures of it! I also made a matching diaper and wipe strap that I think would be very useful for the diaper bag, especially when you are going to a public restroom or just out of the house quickly. This tutorial is coming soon!